Hello, 5th and 6th grade.
June 2-5 2020
Art Lesson: Nature Bugs
Insects – of all kinds – are fascinating creatures to explore and learn about. Don’t be squeamish and be careful of ticks!
For this weeks art lesson, look closely at a bug. If you need to, do an internet search for different kinds of bugs, to get an idea of what they look like.
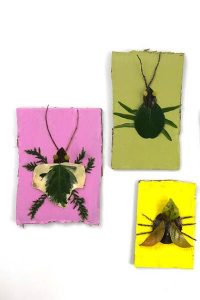
We will be making nature art bugs from leaves and twigs and found items as you talk a walk in nature. This creative leaf art really pops on bright painted backgrounds made from recycled cardboard and makes lovely wall art.
Use a piece of recycled cardboard as the base or background and MIX a new paint color to paint it a solid color with acrylic or tempera paints. Be sure to let it dry completely! The nature items you collected from your garden are the key shapes to make your bug.
MATERIALS:
Found items in nature
leaves, twigs, stems etc.
a piece of cardboard 5″x 5″ as a suggested size
glue
DIRECTIONS:
Go outside and collect pieces of twigs, leaves and stems of things you find outside. Collect more than you think you will use, fresh from the garden or forest.
May 26-29 2020
Art Lesson: A Virtual Museum Tour
It’s time to go on an ART field trip around the world with a virtual Museum Tour! For this weeks Art lesson, I want you to find one of these paintings by picking clicking on one of these museum links and see what they have to offer.
Louvre Museum, Paris France https://www.louvre.fr/en/visites-en-ligne
Find the painting: “The Mona Lisa” by Leonardo Da Vinci
National Gallery of Art, Washington DC USA https://artsandculture.google.com/partner/national-gallery-of-art-washington-dc?hl=en
Find the oil painting: “The Scream” by Edvard Munch
Metropolitan Museum of Art NYC USA https://artsandculture.google.com/partner/the-metropolitan-museum-of-art
Find the painting: “Water Lilies” by Claude Monet
Van Gogh Museum, Amsterdam Netherlands https://artsandculture.google.com/partner/van-gogh-museum?hl=en
Find the painting: “Sunflowers” by Vincent Van Gogh
Activities and Resources
Choose ONE thing to do from the list below:
Choose your favorite painting you found in the virtual tour and create a copycat piece of art of it. Be sure to write down the name of the artist and the art work.
Research your favorite artist from one of the museum tours. Write down why they are your favorite and why you like the artist. What makes the painting you like famous
Choose a painting to focus on. Describe it, tell why you chose it and how it makes you feel.
Choose 2 paintings from the museum tour. compare and write down how are they different, how are they the same?
May 19-22 2020
Art Lesson: Teddy Bears on Parade
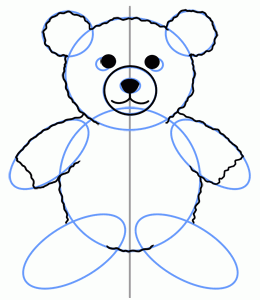
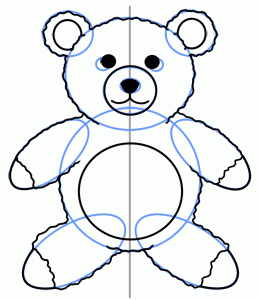
Hello everyone! This week we are going to draw and make a Teddy Bear. I will show you how. Mrs. Sanchini is asking everyone to place a teddy bear or a drawing of a teddy bear in a visible area like on a windowsill, a porch or near a mailbox.
We would like you to decorate the Teddy Bear for Memorial Day by adding a US flag or other patriotic symbol. Send Mrs. Sanchini lsanchini@hamptonschool.org a picture of your Teddy Bear and don’t forget to share it in Google Classroom with me. The Teddy Bears are going to be in a parade for Memorial Day.
MATERIALS:
White and Black Paper, or you can cut up a clean
Brown Paper Bag to make your Teddy Bear
pencil, erasure
crayons
Permanent sharpies markers
Glue if you are going to cut out a Bear.
DIRECTIONS:
Gather together your materials. You need to decide on what kind of Teddy Bear you will make. If it’s a black and white bear, start with a white piece of paper. If it’s a brown bear, start by cutting a brown paper bag and opening it up, and flatten it out.
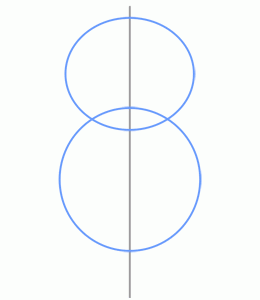
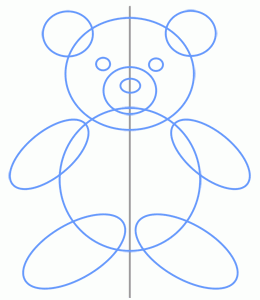
Now we can draw with pencil first, the shape and size of the bear. Teddy Bears are soft and cuddly and made up of round circles and ovals. Start with a large circle for the Teddy Bears body. The circles done have to be perfect 😉 Next draw a smaller circle for the head and place it on top of the body, add two small circles on top of the bears head for the ears. Add ovals for the legs and smaller ovals for the arms. Then add the details of the bears face. Two circles for the eyes, a small circle for the bears muzzle in the center, then an even smaller circle for the nose. The mouth is a straight line down from the small circle of the nose, and at the end of that line, add two small upside down “C’s” on each side of the straight line to finish the mouth.
Erase any lines that overlap and color in your bear. Chalks work great on brown paper. Use a black marker for the details like paws, and eyes.
If you are building your bear cut out the shapes of the circles and glue them together.
May 12-15 2020
Art Lesson: Art Review…How is it going?
We will be meeting this week on Google Classroom Meet for this Thursday, May 14th at 10:30 am. I will want to see how you are doing. How are the Art assignments I’ve given you progressing? I really miss you all and am excited to start our Art Lessons in Google Classroom Meet.
Please prepare any questions you have.
May 5-8 2020
Art Lesson: Cinco De Mayo Tinfoil Art
The Mexican Folk Art Everyone Loves!
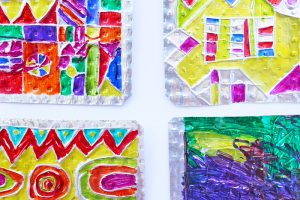
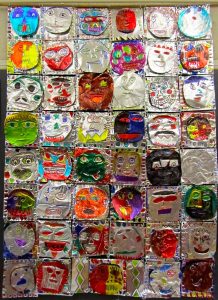
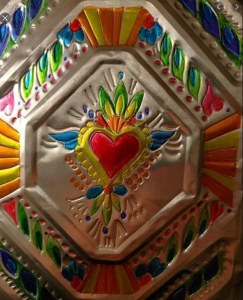
One of the least known, most versatile, and most beautiful expressions of Mexican folk art is hojalata (tin art work), also known in some parts of Mexico as, lamina or lata. Since the 1500’s, this humble metal has been made more pleasing by being shaped, stamped, punched, painted and cut into a wide variety of decorative and beautiful artwork. This art project is simple to make and lots of fun too. The technique is really easy, and the possibilities are endless. Use your imagination to recreate patterns, textures or designs. The end results can be truly breathtaking. Here are a few simple examples:
MATERIALS:
A piece of Cardboard 8″x8″ is a good size
you can make yours bigger or smaller.
pencil, erasure
Tin Foil, as wide as our cardboard piece
Permanent sharpies markers
Yarn, scissors
Liquid glue (white or clear – doesn’t matter
brush for applying glue
Optional: glue gun with lots of refills
Glue cartridges
DIRECTIONS:
This project can be done using yarn or a hot glue depending on what materials you have handy. Start by drawing a picture, pattern or design in pencil on a piece of cardboard. Then dip pieces of yarn into white glue and lay that down over the drawn lines. Or if you are using a hot glue gun, trace over the pencil lines with the hot glue gun. Once the yarn/glue has dried, cover the whole surface of the cardboard with a thin layer of white glue and cover that with the tinfoil. Press the foil down around the yarn and cardboard surface so that the yarn makes raised lines in the tinfoil.Once the foil is pressed flat into place, use markers to color areas or shapes made by the raised lines.
April 28-May 1st 2020
Art Lesson: 3-D Art Elements Cube
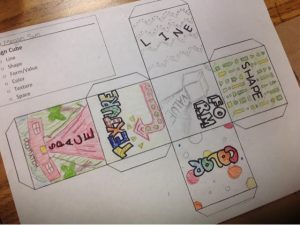
For this assignment we are going to make a 6″x 6″ CUBE.
Make it out of heavy paper and add designs on each side of the cube. Please use heavy WHITE paper to draw the cube pattern.
The cube must have designs on each of it’s 6 sides, so consider how each side is connected around the cube.
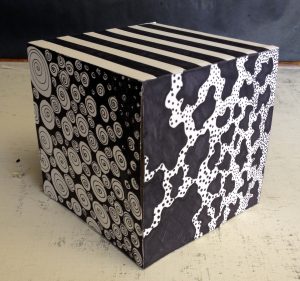
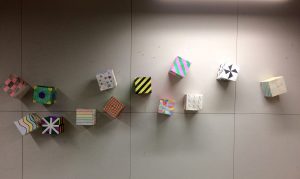
Try to make the designs carry around the cube, visually connecting the sides of the cube.
When you draw your designs on the sides of the cube make one side of the cube using just LINES (different kinds of lines), another side for just SHAPES, another side using COLOR, then another side with a design that shows VALUE (light and dark), one side that shows TEXTURE and the last side, a design that shows SPACE.
Use a ruler and pencil and measure correctly drawing the cube pattern on a sheet of heavy paper.
View the link to show you how to do that https://www.wikihow.com/Make-a-Paper-Cube.
Next NEATLY cut out the flat shape of the box and fold the edges up and glue edges to make the cube.
I recommend scoring your pencil lines with a blunt tool for a smoother fold.
Glue the cube together neatly, pinching the edges together (a paper clip will hold the edges while the glue dries).
MATERIALS:
Heavy paper
Pencil
RULER
Scissors
Glue stick or other
Black sharpie
colored sharpie (optional)
paper clips to hold the shape together as you glue it
DIRECTIONS:
Before you glue the cube together, create a design on all 6 sides while the cube pattern is flat. Use markers and stick to either black and white, or black and a second color for your design. The idea for making designs on the sides of the cube is to visually connect the edges or form of the cube.
Note: you may make a smaller cube, if you don’t have larger size paper. Don’t make it too small!
April 21-24th
Art Lesson: 3-D Castles
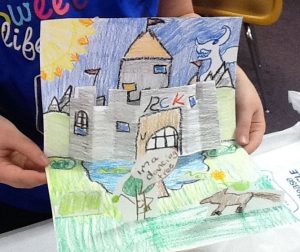
Drawings are considered 2-dimensional, because they are flat. You made a drawing of a castle last week. This week, let’s try building one that is 3-dimensional. You could make a 3-D castle out of legos or other building block you have at home, if you don’t want to use paper. If you don’t have anything to build with, use paper and your imagination. This is a pop up Castle and it’s fun to build. You can google Pop Up cards to get ideas on how to do this.
You’ve all seen Pop Up Books, well, how about making a castle that has a background, middle ground and foreground.
Materials:
2 pieces of card stock or Drawing Paper 9″x 12″
Pencil
Erasure
Markers
Crayons.
Glue
Scissors
Directions:
Fold one of the pieces of paper in half. This paper will hold the background, middle ground and foreground. Or, the sky, and ground. Color in a sky and landscape with crayons or markers on this paper. Add mountains, trees, clouds, birds, dragons, rocks anything you like! Make it detailed and colorful.
The second sheet of paper is folded so that it has at least two sides and a front, you can add more sides by adding more folds. This will be the castle.
The second sheet of paper can be folded into several sections and decorated as the castle walls with markers or crayons. Turrets can be cut from the top, cut out doors and windows, make a small flag to glue to your towers etc. Once colored and cut out, glue the castle to the background. Cut out a castle shape but leave two vertical flaps folded inside so they don’t show, on either side of the castle, and glue both sides to the background. You can add more cut out shapes to the background, like trees and bushes…but be sure to fold a tab of paper under the cut out shapes so that you can glue it to the background. And glue into position the other stand up objects in different places on the ground. There are many ways to make a pop up. The simplest way is to draw, color and cut out shapes to stand up on your ground. I would love to see how you made your castles 3-d. Remember to post your artwork.
April 14th-17th
Art lesson: Draw and Color a medieval CASTLE
It’s fun to imagine what kind of castle a King and Queen would live in. There was no electricity only candles, and certainly no internet!
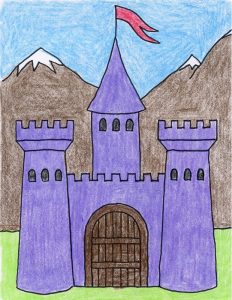
Can you use your imagination to draw a castle? How detailed can you make it? Start by turning your paper, either vertically or horizontally. Can you add overlapping mountains in the background? What does your castle have, towers, walls? A draw bridge? A moat? A banner announcing the name of your Castle?
Materials:
Drawing Paper 12″x 18″
Pencil
Erasure
Markers
Crayons.
Directions:
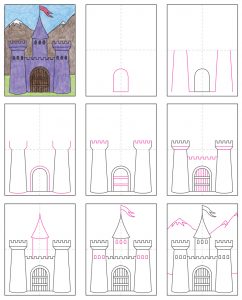
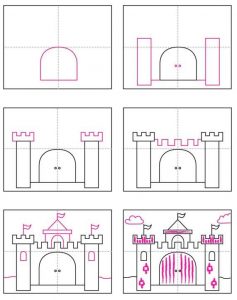
Draw two lines on your paper to divide your paper into half and then half again. Start with step one and follow each step adding to your drawing. When you have a basic castle drawn, that’s the time to add your unique details to your picture.
Here is a quick step by step to draw the castle on a vertical paper (the paper turned up and down, portrait mode.
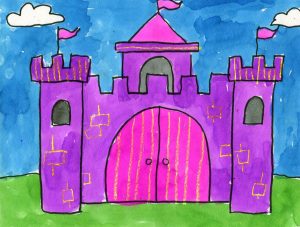
Here is how to draw a castle on a horizontal (or side to side or landscape mode)
April 7th-10
New Art lesson: Paint a Peter Max Landscape
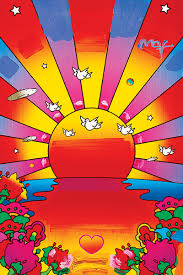
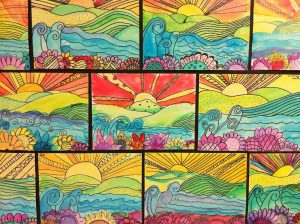
Famous Artist Peter Max, is known for his comic book style of art called Pop Art. Peter Max is a graphic artist known for his use of bright, vibrant colors that blend into one another. He began his artistic career in the 1960s by opening a small arts studio with his friend. He is regarded as one of the most popular among all living American artists. Do a google search for Peter Max and see if you can find what his style of art looks like. Here is an example of his work, he is using warm and color colors. Here are some students artwork who copied Peter Max’s style:
Materials:
Poster paper 12″x 18″ or bigger, card board if you have it.
pencil, erasure
paints,
brushes
water container
paper towel
Directions:
Take a look at Peter Max’s artwork. What do you notice about his work? He places the sun in the middle of the paper and also has symbols such as hearts, birds and stars in his pictures. Use a pencil and sketch out a landscape in the style of art work of Peter Max.
Add details with small, medium and large shapes that can be colored in. Notice that there is a background, middle ground and foreground where his shapes overlap each other. Since it’s a landscape, put your paper horizontally. Add land, sun, clouds, fantastic flowers, using patterns and repeating lines and shapes. Outline your pencil lines with a black or dark marker, then erase any pencil lines you don’t want in your picture.
Now, you can paint! If you have acrylics, great! Those paints blend beautifully. Water colors are harder to work with as they are difficult to control, although you can use them. Tempera paints can work, too. If you use markers, crayons, or oil pastels make your picture smaller. Fill the page with intense color and email me your work!
Try to have some of your shapes overlap in your picture.
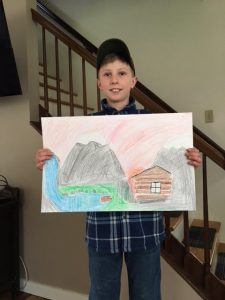
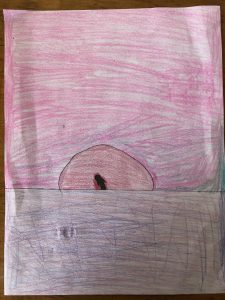
Cody and James made Peter Max Landscape drawings.
I hope you are all doing well and staying safe. Thought I’d share with you that making comics by drawing characters is FUN! That is what 5th grade started in Art. So, to do this, think up a funny short story. Write it down with two or more sentences. Remember to keep it short. Then sketch out a main character, it could be a made up one, an alien even! Put some time and thinking into your character. If you want you can look up How2drawanimals.com if your character is an animal. Take a picture of what you drew and show us. More to come.
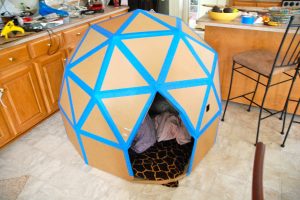
OPTIONAL: Art project idea, Build a Cardboard Dome
Art teachers are always thinking up cool things to make! I saw this and thought it would be a fun hideaway fort to build if you are inspired and have math skills, lots of cardboard, duct tape, and an adult to help you safely cut the cardboard into triangles.
You don’t have to build it big, you could build one smaller which might be easier, and it could be a kitty fort 🙂 A full size one would be a challenge to build and take lots of time, but I think it could be done and would come out AWESOME!
Materials:
cardboard
duct tape
hot glue gun
exacto knife
or box cutter
ruler
pencil
Directions:
http://hannahandlily.blogspot.com/2011/07/coolest-cardboard-house-ever.html
https://www.ehow.com/how_2223612_build-cardboard-geometric-dome.html
